slidy/demo
search:
WiNK edit 

{
	 "title" : "SliNKi = Slidy + WiNK",
	 "css" : "
	 				body { background-color: white; }
	 				div.slide h1 { color : #555555; }
	 				div.slide { padding: 20px; }
li { color: #555555; }
div.slide h1 {	
		background: #DDDDDD; padding-left: 5px; margin-top: 5px; margin-right: 100px;
		-moz-border-radius: 10px; 
		-webkit-border-radius: 10px;
		border-radius: 10px;
		}
a:link { color: #5F58A1; }
a:visited { color: #5F58A1; }
div.toolbar { font-size: 40%; }
pre {
border: 0px;
background-color: #D3D8E3;
color:#00428C;
font-size:60%;
font-weight: normal;
line-height:120%;
padding:0.2em 1em;
-moz-border-radius: 10px; 
-webkit-border-radius: 10px;
border-radius: 10px;
}

	 ",
	 "copyright" : "© 2010 Peter Rodgers, Brian Sletten",
	 "favicon": "http://www.w3.org/Talks/Tools/Slidy2/graphics/icon-blue.png",
	 "duration" : "5",
	 "splash" : "<div style='background-color: white; border: 3px solid #555555; -moz-border-radius: 10px; border-radius: 10px;' id='splash'>
<div style='font-size: 300%; margin-left: 20px; font-weight: bold;'>Sl<span style='color:red;'>i</span>NKi</div>
<div style="font-size: 100%; margin-left: 20px;">
A demonstration of Slidy in combination with the WiNK wiki.
</div>
<div style="font-size: 75%; font-style: italic; margin-left: 20px; padding: 20px 0px 20px 20px;">
Press space or click the page for next slide...
</div>
<div style="position: relative; top: 30px; left: 20px;">
<table style='background-color: white;'>
<tr>
<td>
<img src="http://resources.1060research.com/img/wiki/1060Research-xsmall.png" /> 
</td>
<td>
<img src="http://resources.1060research.com/img/wiki/cross-new1.png" /> 
</td>
<td>
<img src="http://www.w3.org/Talks/Tools/Slidy2/graphics/icon-blue.png" /> 
</td>
<td>W<span style="color: red;">i</span>NK</td>
<td><img src="/wink/style/poweredby.png"/></td>
</tr>
</table>
</div>
</div>",
	"splashDuration": "7000"
}


<div style="position:fixed; top: 40px; right: 10px; color: #333333; font-weight: bold;">Sl<span style="color: red;">i</span>NKi</div>
<div style="position:fixed; bottom: 50px; left: 15px;">
<table style='background-color: white;'>
<tr>
<td>
<img src="http://resources.1060research.com/img/wiki/1060Research-xsmall.png" /> 
</td>
<td>
<img src="http://resources.1060research.com/img/wiki/cross-new1.png" /> 
</td>
<td>
<img src="http://www.w3.org/Talks/Tools/Slidy2/graphics/icon-blue.png" /> 
</td>
<td>W<span style="color: red;">i</span>NK</td>
<td><img src="/wink/style/poweredby.png"/></td>
</tr>
</table>
</div>
 

<style>
div.slide.title h1	{ font-size: 250%; } 
</style>


<img src="/wink/res/slidy/demo/img/glassfrog.jpg" style="opacity: 0.10; position:fixed; top: 0px; left: 0px; " width="100%"/>
<div style="opacity: 0.25; position:fixed; bottom: 40px; right: 20px;">Background Text</div>


<div style="position:fixed; bottom: 0px; right: 0px; width: 100%; height: 100%; background-color: #EFEFEF;">
</div>
<div style="position:fixed; top: 40px; right: 10px; color: #333333; font-weight: bold;">Sl<span style="color: red;">i</span>NKi</div>
<div style="position:fixed; bottom: 50px; left: 15px;">
<table style='background-color: white;'>
<tr>
<td>
<img src="http://resources.1060research.com/img/wiki/1060Research-xsmall.png" /> 
</td>
<td>
<img src="http://resources.1060research.com/img/wiki/cross-new1.png" /> 
</td>
<td>
<img src="http://www.w3.org/Talks/Tools/Slidy2/graphics/icon-blue.png" /> 
</td>
<td>W<span style="color: red;">i</span>NK</td>
<td><img src="/wink/style/poweredby.png"/></td>
</tr>
</table>
</div>
<div style="opacity: 0.25; position:fixed; bottom: 200px; right: 100px;">EXAMPLE</div>
 

<style>
div.slide.inter	{ color: red; }
div.slide.inter h1	{ font-size: 400%; background-color: white;} 
</style>
<div style="position:fixed; bottom: 0px; right: 0px; width: 100%; height: 100%; background-color: yellow;">
</div>
<div style="position:fixed; top: 40px; right: 10px; color: #333333; font-weight: bold;">Sl<span style="color: red;">i</span>NKi</div>
<div style="position:fixed; bottom: 50px; left: 15px;">
<table style='background-color: white;'>
<tr>
<td>
<img src="http://resources.1060research.com/img/wiki/1060Research-xsmall.png" /> 
</td>
<td>
<img src="http://resources.1060research.com/img/wiki/cross-new1.png" /> 
</td>
<td>
<img src="http://www.w3.org/Talks/Tools/Slidy2/graphics/icon-blue.png" /> 
</td>
<td>W<span style="color: red;">i</span>NK</td>
<td><img src="/wink/style/poweredby.png"/></td>
</tr>
</table>
</div>

SliNKi = Slidy + WiNK

This is a set of slides showing the Slidy macro extensions for WiNK

WiNK is...

  • a resource oriented Wiki application for NetKernel
  • available for install from the NetKernel repositories using Apposite
  • a recursive wiki markup runtime.
  • extensible with hot installable macros
Wiki Slides

Combining WiNK with Slidy allows you to create presentations using Wiki markup. You can make any wiki page into a Slidy presentation with the following steps...

  1. Add a {slidyimport} statement at the top of your wiki document - this uses a JSON array to set up the page with the slidy scripts etc.
  2. Define a slide with a {slidy} tag.
  3. Write wiki inside the {slidy} tag.
  4. Create as many slides as you need all in the one wiki page.

The next slide shows an example...

WiNK Slidy Example

Here's an example of a Slidy wiki page with two slides...

{slidyimport}
	{	"title": "Slidy Demo",
		"css" : "body: white;",
		"copyright": "blah blah bah",
	}
{/slidyimport}

{slidy}
=Hello=

Some text

*Bullet list
{/slidy}

{slidy}
=Second Slide=

Something else
{/slidy}
Which looks like this...

Hello

Some text

  • Bullet list

Second Slide

Something else

Features

The following slides show the other features that are available...

Source

For reference the wiki source for these slides is here.

Incremental Reveal

  1. Some numbered bullets
  2. Item 2

Below are some incremental bullets

  • Some more bullets
  • Another bullet

Use the {incremental} tag to mark content for progressive reveal.

{incremental}
*Some more bullets
*Another bullet
{/incremental}

Resource Oriented Requests

Supports ROC requests with {request} tag

  • Simple request syntax

{request}res:/some/thing{/request}

{request}
<request>
<identifier>active:groovy</identifier>
<argument name="operator">res:/myscript.gy</argument>
</request>
{/request}

Below is a dynamic inline groovy script showing the current time...

Time now: Mon Dec 23 01:33:23 UTC 2024

Self Referencing Links

Since this is just a Wiki you can create links within the presentation

  • Here is a link back to the second slide
  • Which is this wiki markup...

Here is a link back to the [#(2)|second slide]

Images - SVG

Here is an external referenced SVG using the {svg} tag

Example:

{svg}res:/slidy/demo/img/circles.svg{/svg}

Here is a literal inline SVG using the {svgliteral} tag

Images - Bitmap

Here is a bitmap using the {image} tag

Example:

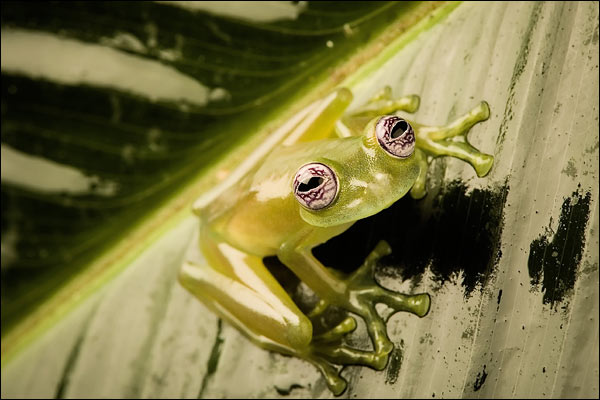
{image}wink/res/slidy/demo/img/glassfrog.jpg{/image}

POH - Plain Old HTML

Use the {html} tag for plain old HTML

Here's an example of how the {html} tag can be used to include the Protovis Javascript Visualization Library...

Support For Handout Notes

  • This slide has handout notes
  • Press the A key to reveal handout notes

Images - Bitmap Incremental Test

Here is a bitmap using the {image} tag inside {incblock} (incremental revealed block content)

<img src="/wink/res/slidy/demo/img/glassfrog.jpg"/>

Images - SVG Incremental Test

Here is an external referenced SVG using the {svg} tag inside {incblock} (incremental revealed block content)

<svg xmlns="http://www.w3.org/2000/svg" width="5cm" height="4cm">
  <g transform="scale(0.3)">
  <style type="text/css">
    circle:hover {fill-opacity:0.9;}
  </style>
  <g style="fill-opacity:0.7;">
    <circle cx="6.5cm" cy="2cm" r="100" style="fill:red; stroke:black; stroke-width:0.1cm" transform="translate(0,50)" />
    <circle cx="6.5cm" cy="2cm" r="100" style="fill:blue; stroke:black; stroke-width:0.1cm" transform="translate(70,150)" />
    <circle cx="6.5cm" cy="2cm" r="100" style="fill:green; stroke:black; stroke-width:0.1cm" transform="translate(-70,150)"/>
  </g>
  </g>
</svg>

Here is a literal inline SVG using the {svgliteral} tag

<div class="svg"><script type="image/svg+xml">
<svg xmlns="http://www.w3.org/2000/svg" width="5cm" height="4cm">
  <g transform="scale(0.3)">
  <style type="text/css">
    circle:hover {fill-opacity:0.9;}
  </style>
  <g style="fill-opacity:0.7;">
    <circle cx="6.5cm" cy="2cm" r="100" style="fill:red; stroke:black; stroke-width:0.1cm" transform="translate(0,50)" />
    <circle cx="6.5cm" cy="2cm" r="100" style="fill:blue; stroke:black; stroke-width:0.1cm" transform="translate(70,150)" />
    <circle cx="6.5cm" cy="2cm" r="100" style="fill:green; stroke:black; stroke-width:0.1cm" transform="translate(-70,150)"/>
  </g>
  </g>
</svg>
</script></div>

Source Code Highlighting

Use the {java} source code tag

//Actually Javascript but its source code...
var data = pv.range(0, 10, .1).map(function(x)
{
    return {x: x, y: Math.sin(x) + Math.random() * .5 + 2};
  }
 );
 

Layout Test - Double Column, Float Image

Demonstrates the {wiki} tag which allows parsing of wiki embedded within HTML

  • Bullet Col 1 Item 1
  • Bullet Col 1 Item 2
  • Bullet Col 1 Item 3
  • Bullet Col 2 Item 1
  • Bullet Col 2 Item 2
  • Bullet Col 2 Item 3

Floating Frog

Technical: How it works

"It eeeze not a miricle. It eeeze sciyance"

The integration of Slidy into WiNK is accomplished by a small set of dynamically imported macros (quick reference). You can consider these as a specialized application framework running on top of the core WiNK runtime platform.

There is a detailed guide to WiNK which explores how it is itself just a composite resource-oriented application built on top of a set of core NetKernel services.

WiNK was one of the first applications we developed on the general ROC abstraction of NetKernel 4. It's now about 4 years old and, even though NetKernel and the service libraries it uses have undergone continual evolution in that time, WiNK has not required any maintenance or bug fixes.

Technical: Usage Notes

  • Remember that a set of slides is really a single resource - you can see this if you press the A key to reveal all slides.
  • As such, all requests and includes etc are evaluated in a single pass
  • To do interactive stuff you'll probably want to make ajax requests to NK services - jquery is pre-included in each slideset.

Slidy Keys QuickRef

  • F11 - Toggle fullscreen display mode (if your browser supports this!).
  • A - Show all slides and notes, for printing
  • F - Hide/Show lower navigation bar
  • C - Show table of contents
  • S - Scale font Smaller
  • B - Scale font Bigger

Slidy Macros QuickRef

  • {slidyimport} - set's up the Slidy environment in WiNK optionaly may have JSON array of optional settings...

{slidyimport}
{	"title": "Your title here",
	"css" : " body: white; //Any other css changes",
	"copyright": "Your copyright statement here",
	"cssref": "res:/some/referenced/css/resource.css"
}
{/slidyimport}

  • {slidy} defines a slidy slide - the contents are recursively evaluated as wink wiki text (may include further macro tags).
  • {request} a ROC request (simple or declarative request syntax).
  • {incremental} - mark list items for incremental reveal
  • {incblock} - mark a block item (image, div, para etc) for incremental reveal.

Slidy Macros QuickRef - Content Macros

  • {notes} specifies notes that are only visible on handouts - press A to view
  • {html} a block of plain HTML.
  • {wiki} a parseable block of wiki inside a block html!
  • {image} a bitmap image reference (must be externally visible to browser)
  • {svg} an SVG image reference (may be an internal resource request)
  • {svgliteral} an inline SVG image.
  • {java} - content is rendered using source code highlighting.
  • {xml} - content must be XML and is rendered using XML colour highlighting.

Background

Testing Testing

  • One
  • Two
  • Three
  • Four

This slide has a background image and "Background Text" in the lower right corner.

Interstitial Example

This slide is supposed to be a smart interstitial!

(Yeah I know the design sucks. But it proves the concept)

After Interstitial

All back to normal again.

Horizontal Center

This should be horizontally centered and be 75% wide. Using {centerh+width@75%}..{/center}

  • Some
  • Narrow
  • Bullets

Vertical Center

This should be vertically centered {centerv}..{/center}

Horizontal + Vertical Center Text

This is text in the horizontal and vertical middle.

Horizontal + Vertical Center Image

Horizontal + Vertical Center Wiki

Title

  • Bullet 1
  • Bullet 2
  • Bullet 3

Centered Tables in MediaWiki Syntax with CSS

GET
POST
PUT
DELETE


WiNK
© 2008-2011, 1060 Research Limited